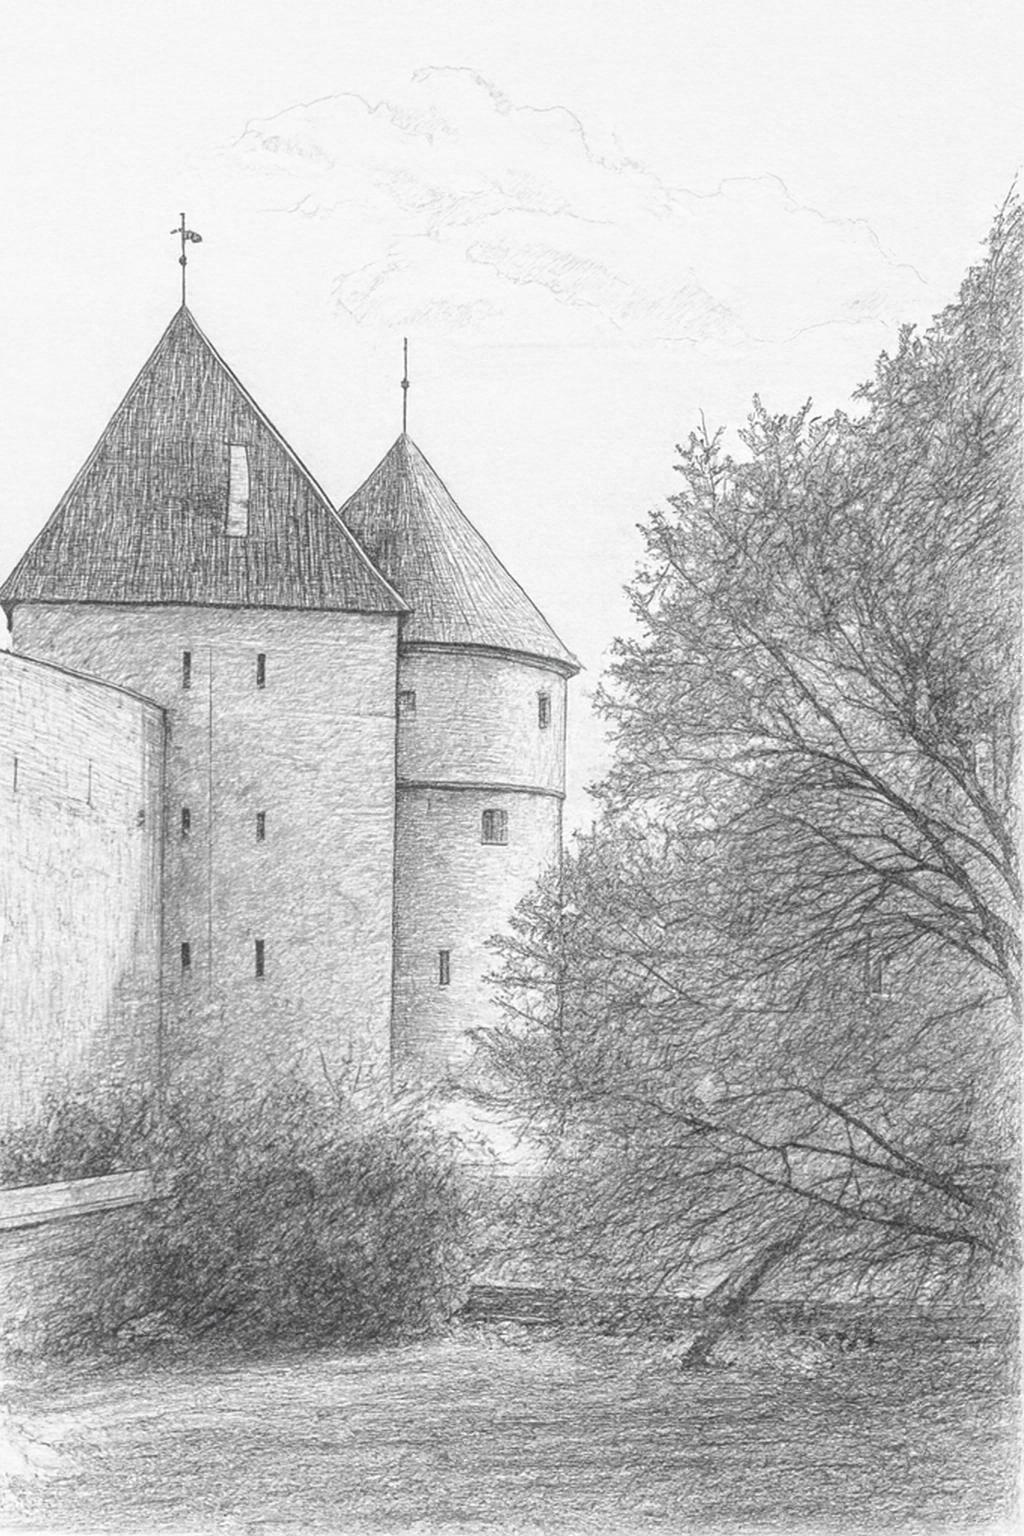
tallinn.jpeg
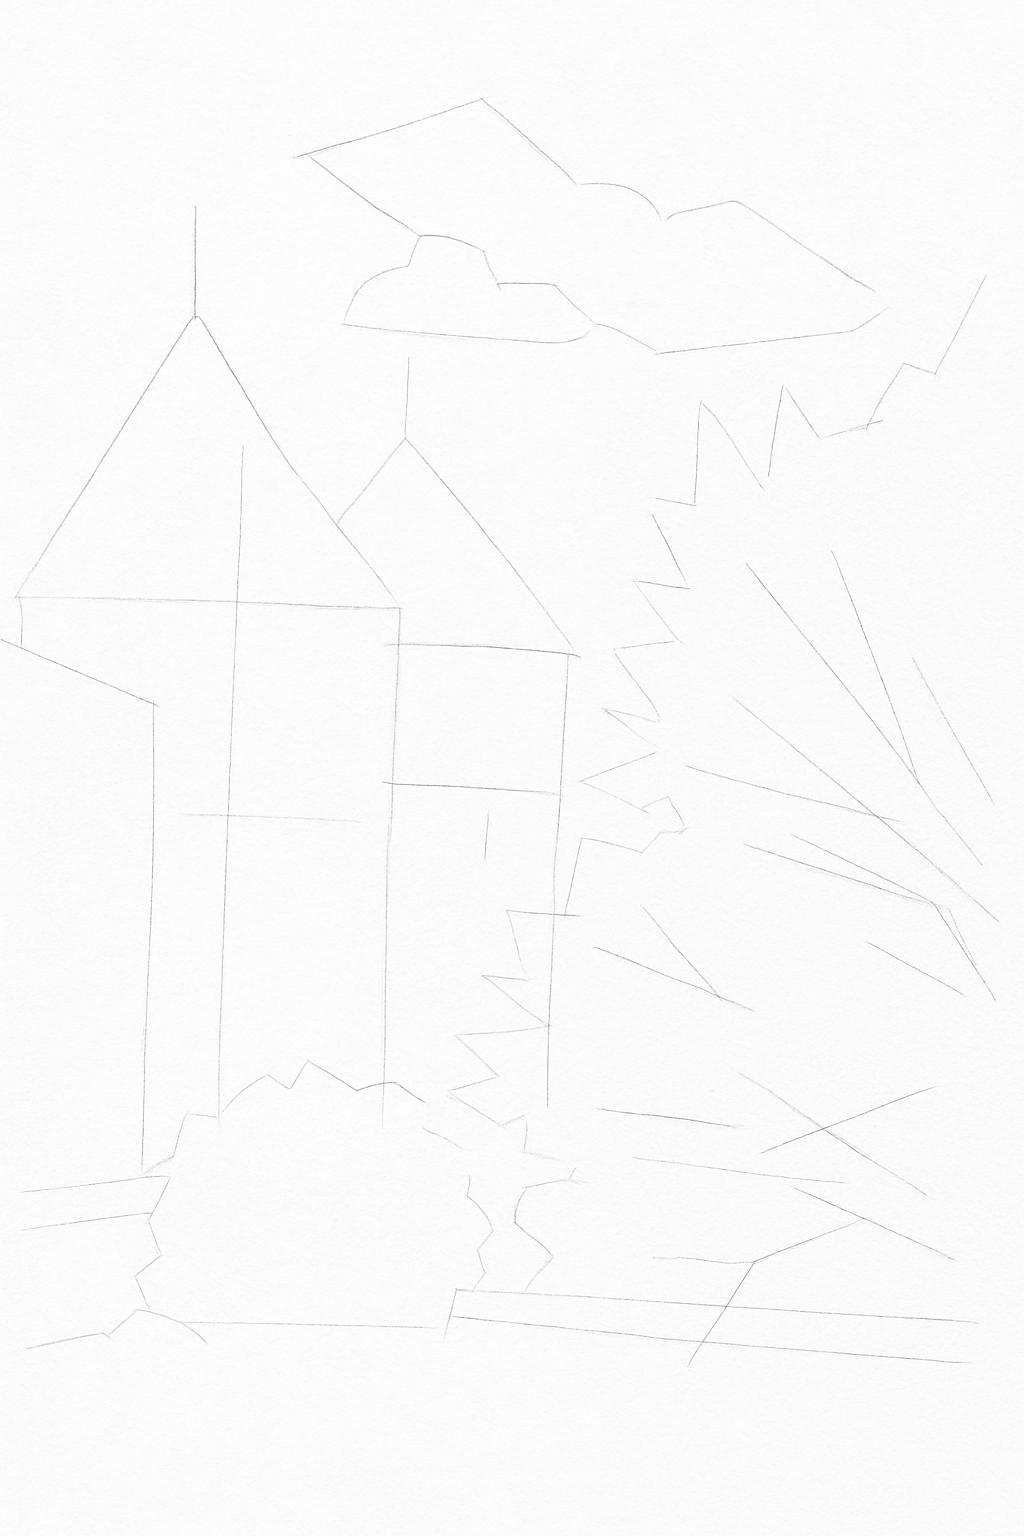
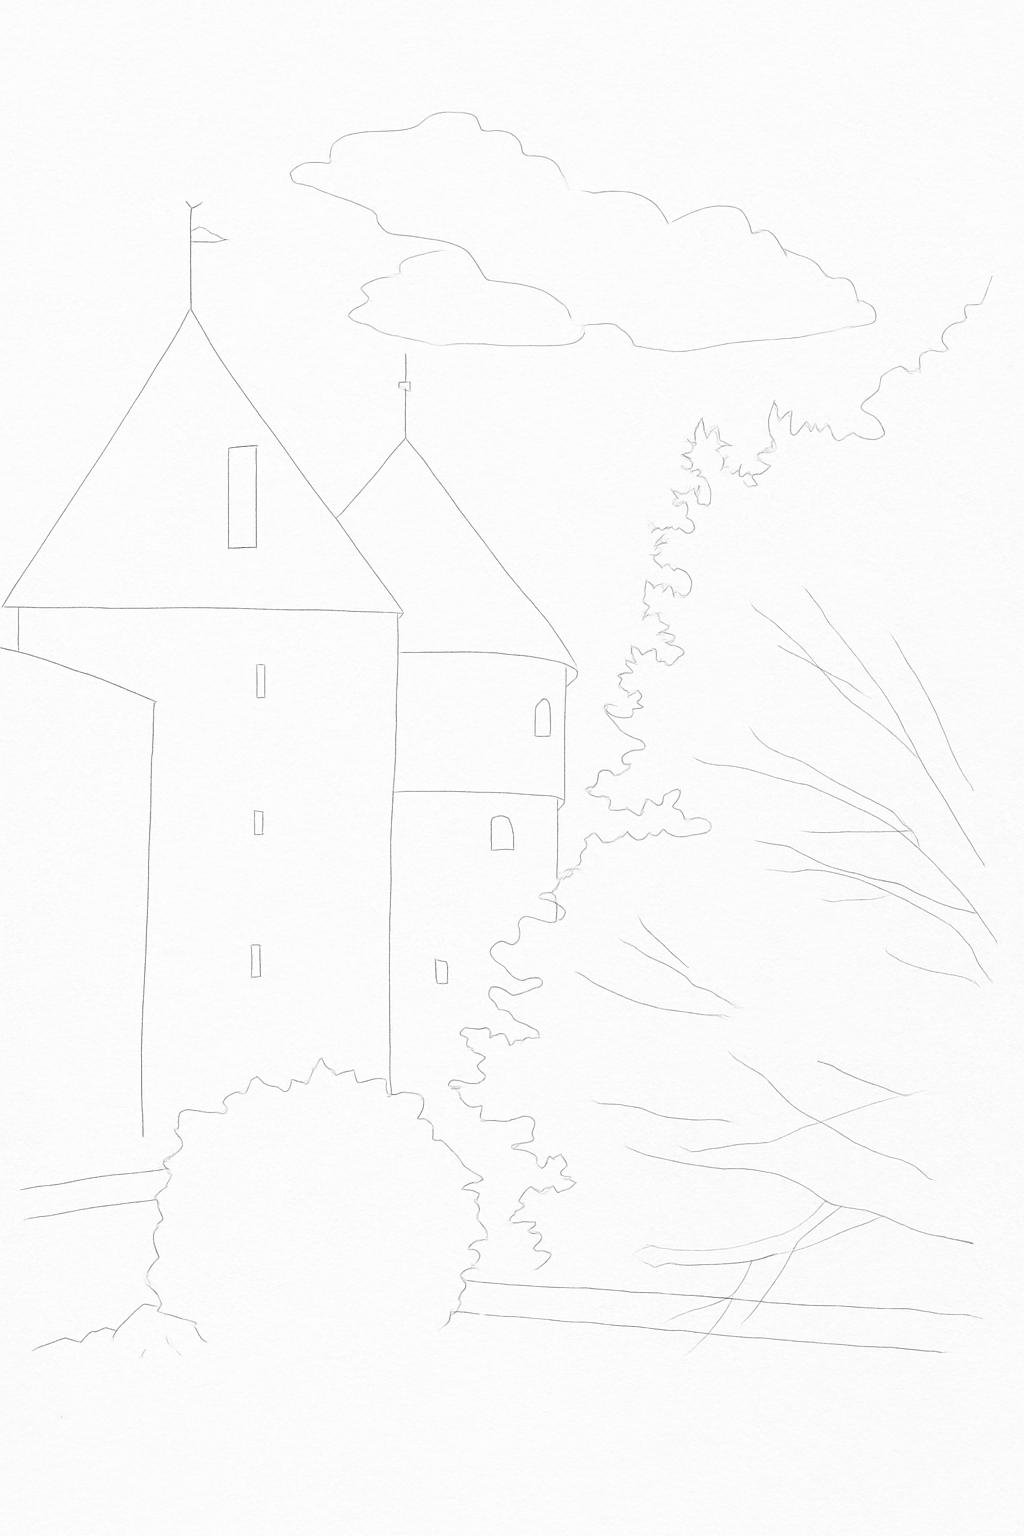
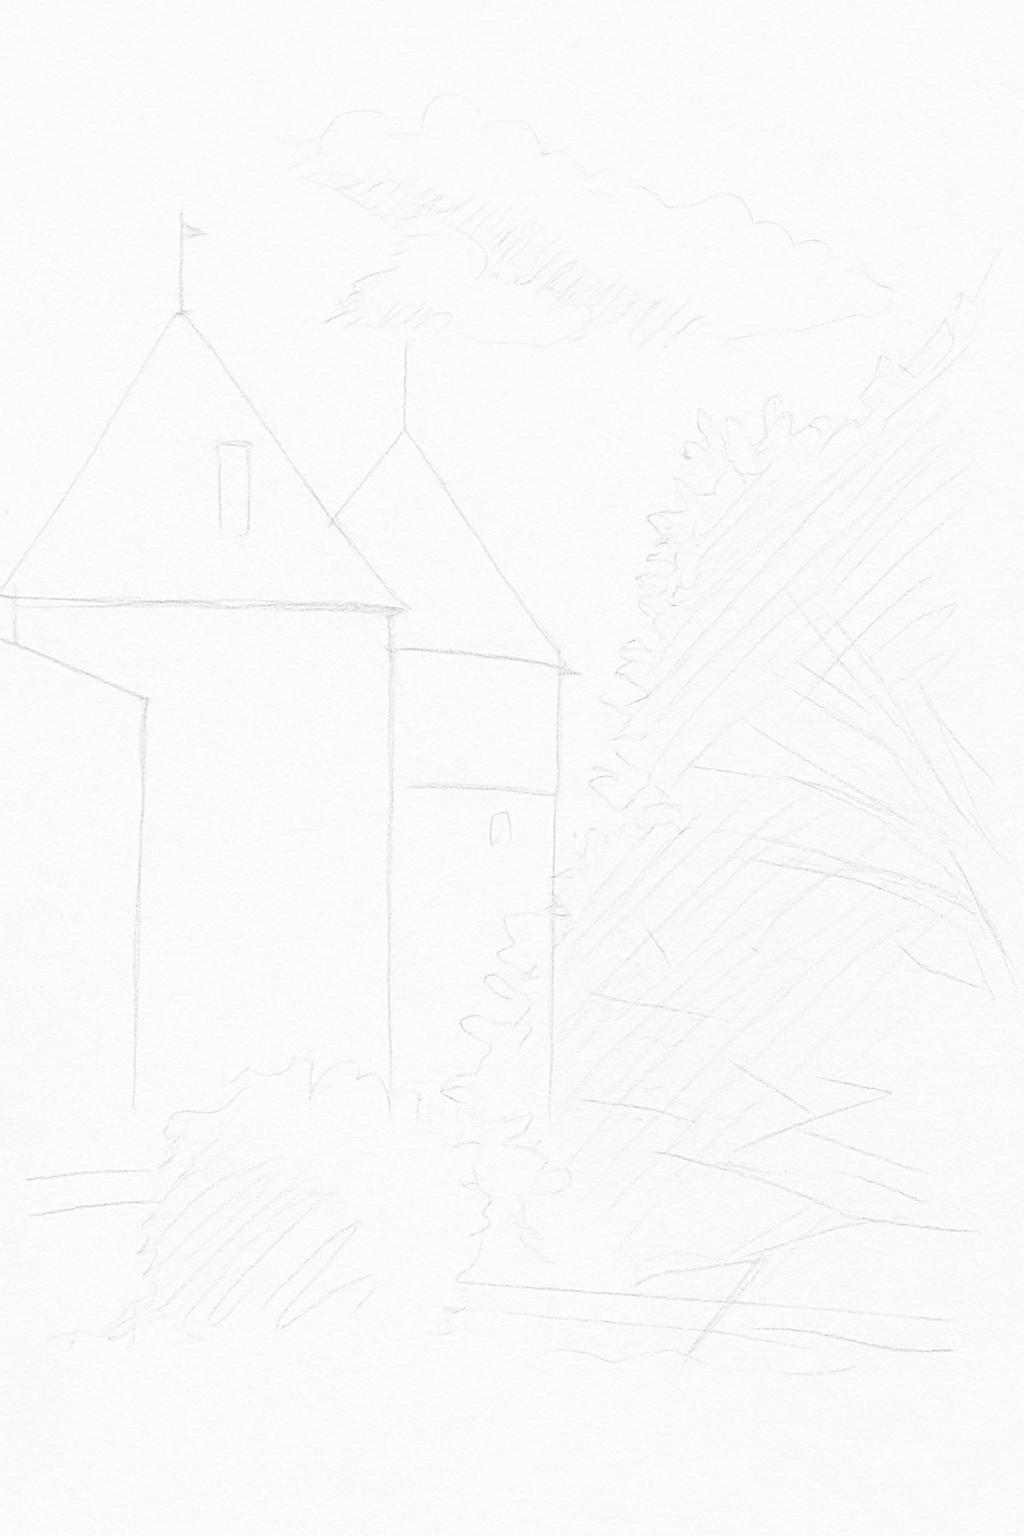
Five sketch levels ready for practice
Your original photo.

Your sketches.
Five progressive levels from simple shapes to detailed drawing.
Step 1: Getting Started
Every drawing starts here! Use a light 2H pencil (or press lightly with any pencil) to map out the basic shapes and get your proportions right with loose construction lines.
Step 2: Drawing the Outline
Now clean up those rough lines with an HB pencil (or medium pressure) into a clear outline. Focus on the main shapes and features - no shading yet!
Step 3: Adding Shadows
Time to add dimension! Switch to a B pencil (or press a bit harder) and block in the basic shadows to show where light hits and where it doesn't.
Step 4: Building Depth
Make it look more realistic with a 2B pencil (or firmer pressure) by smoothing out your shading and adding smaller details throughout.

Step 5: Finishing Touches
The final step! Use 2B and 4B pencils (or vary your pressure) to polish everything up with good contrast and clean details for a drawing you'll be proud of.